You’ve set up Google Tag Manager. Your tags fire, your data flows to analytics. Everything seems fine — until a developer changes a button’s CSS class and half your tracking silently breaks.
This is where the data layer comes in. It’s the foundation that separates fragile, scrape-based tracking from robust, reliable measurement. If you’re serious about analytics, understanding the data layer isn’t optional — it’s essential.
This guide explains what the data layer is, why it matters, and how to start using it effectively. No fluff, just practical knowledge you can apply today.
What Is a Data Layer?
A data layer is a JavaScript object that stores and organizes information about your website and user interactions. Think of it as a structured container that holds all the data your analytics and marketing tools need to do their jobs.
In technical terms, it’s simply a JavaScript array that looks like this:
window.dataLayer = window.dataLayer || [];
dataLayer.push({
  'pageType': 'product',
  'productName': 'Blue Widget',
  'productPrice': 29.99
});
When something happens on your site — a page loads, a user clicks a button, a form gets submitted — structured information about that event gets pushed into the data layer. Google Tag Manager then reads this information and uses it to fire tags, set variables, and send data to your analytics platforms.
The key insight is this: the data layer acts as a middleman between your website and your tracking tools. Instead of GTM scraping values directly from your page’s HTML, your site explicitly tells GTM what’s happening in a consistent, reliable format.
Why the Data Layer Matters
You might wonder why you can’t just grab values directly from your page. After all, GTM has built-in variables for URLs, click elements, and form fields. However, relying on these creates significant problems.
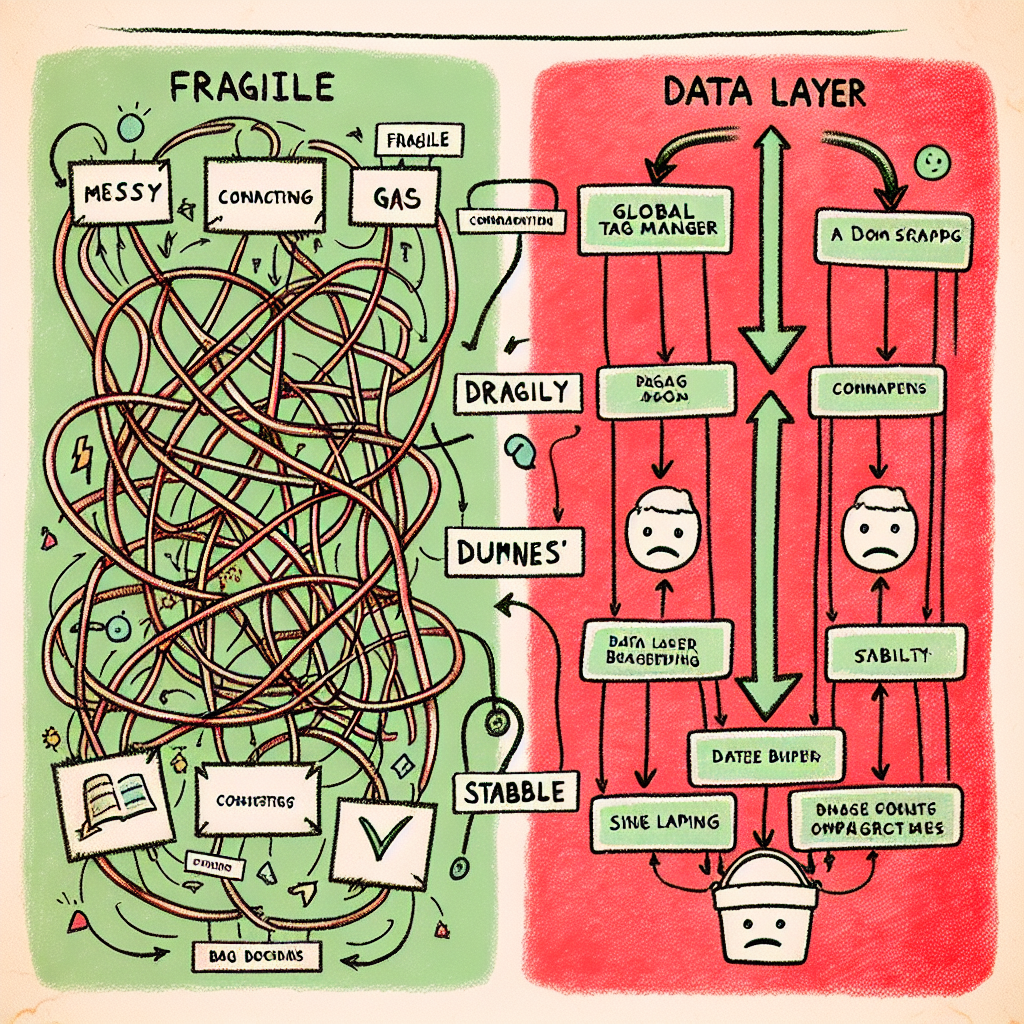
The Problem with DOM Scraping
When GTM reads values from your page’s HTML (called DOM scraping), your tracking becomes tightly coupled to your site’s visual structure. This means:
- A CSS class change can break your click tracking
- A redesign can destroy months of carefully configured tags
- Dynamic content may not be available when GTM looks for it
- Different page templates require different tracking configurations
I’ve seen companies lose weeks of data because a developer renamed a button class during a routine update. Nobody noticed until the monthly report came in with suspicious gaps. This is exactly the kind of silent failure that the data layer prevents.
How the Data Layer Solves This
The data layer operates independently of your site’s visual design. When a user performs an action, your site pushes structured data into the data layer, and GTM reads it directly. Consequently, you get several benefits:
- Stability: Design changes don’t break tracking
- Consistency: The same data structure across all pages
- Clarity: Explicit, documented data instead of scraped values
- Speed: Data is available immediately, no DOM parsing needed
Furthermore, the data layer creates a clear contract between developers and marketers. Developers commit to pushing specific data in a specific format. Marketers can rely on that data being there. Both teams can work independently without stepping on each other’s toes.
How the Data Layer Works
Understanding the mechanics helps you use the data layer effectively. Let’s break down the key concepts.
Initialization
Before Google Tag Manager loads, you need to initialize the data layer. This code should appear in your page’s <head> section, before the GTM container snippet:
<script>
  window.dataLayer = window.dataLayer || [];
</script>
<!-- Google Tag Manager code goes here -->
This line ensures the data layer exists as an array. The || [] part means “if dataLayer doesn’t exist, create it as an empty array.” This prevents errors if the code runs multiple times.
Pushing Data
Once initialized, you add information using dataLayer.push(). This method adds an object to the data layer array:
dataLayer.push({
  'event': 'purchase',
  'transactionId': 'TXN-12345',
  'transactionTotal': 149.99,
  'transactionProducts': [
    {'name': 'Blue Widget', 'price': 29.99, 'quantity': 2},
    {'name': 'Red Gadget', 'price': 90.01, 'quantity': 1}
  ]
});
Notice the 'event' key. This is special in GTM — it triggers event-based tags. When GTM sees an event pushed to the data layer, it checks if any triggers are listening for that event name. As a result, you can fire tags based on specific actions without relying on click listeners or page URLs.
Reading Data in GTM
To use data layer values in GTM, you create Data Layer Variables. In your GTM container:
- Go to Variables → New
- Select “Data Layer Variable”
- Enter the variable name exactly as it appears in your code
- Save the variable
For nested values like product names in an array, you can use dot notation: transactionProducts.0.name would give you “Blue Widget” from the example above.
Understanding these fundamentals connects directly to how you track campaign performance with UTM parameters — both rely on structured data that flows consistently into your analytics.
Common Data Layer Use Cases
Now that you understand the basics, let’s look at practical applications. These are the scenarios where a data layer provides the most value.
E-commerce Tracking
E-commerce is where the data layer truly shines. Product information, cart contents, transaction details — all of this belongs in the data layer. Google’s Enhanced E-commerce specifically requires a data layer implementation.
dataLayer.push({
  'event': 'add_to_cart',
  'ecommerce': {
    'items': [{
      'item_name': 'Blue Widget',
      'item_id': 'SKU-001',
      'price': 29.99,
      'quantity': 1
    }]
  }
});
This structured approach means your tracking works regardless of how your cart page looks. Additionally, the same data structure feeds both GA4 and any other platforms you use.
User Information
When users log in, push relevant (non-PII) information to the data layer:
dataLayer.push({
  'event': 'user_login',
  'userType': 'returning',
  'membershipLevel': 'premium',
  'accountAge': 365
});
This enables segmentation in your analytics without exposing personal information. You can analyze how premium members behave differently from free users, for instance.
Page Metadata
Push information about the current page that isn’t available in the URL:
dataLayer.push({
  'pageType': 'article',
  'pageCategory': 'tracking',
  'author': 'Benjamin Whitmore',
  'publishDate': '2026-02-02'
});
This allows you to analyze content performance by category, author, or age — insights that would be impossible with URL-based tracking alone.
Form Submissions
Instead of tracking form submissions through GTM’s built-in form trigger (which can be unreliable), push an event when the form successfully submits:
dataLayer.push({
  'event': 'form_submit',
  'formName': 'contact',
  'formLocation': 'footer'
});
This approach only fires when the form actually submits successfully, not when the user clicks a submit button that then fails validation.

Best Practices for Data Layer Implementation
A poorly implemented data layer can cause as many problems as it solves. Follow these guidelines to get it right.
Plan Before You Build
Document your data layer specification before writing any code. Define:
- What events you’ll track
- What variables each event includes
- The exact naming convention (camelCase, snake_case, etc.)
- Data types for each variable
This document becomes the contract between your development and analytics teams. Therefore, everyone knows exactly what to expect.
Use Consistent Naming
Pick a naming convention and stick to it. Mixing productName, product_name, and ProductName creates confusion and bugs. Most implementations use camelCase to match JavaScript conventions.
Push Data at the Right Time
Timing matters. Data must be in the data layer before GTM tries to read it. For page-level data, push it before the GTM container loads. For interaction data, push it when the interaction occurs.
A common mistake is pushing purchase data after the confirmation page loads, but the GTM tag fires on page load — before the push happens. The result? Missing transaction data.
Validate Continuously
Use GTM’s Preview mode to verify data layer pushes. Check that:
- Events fire at the correct moment
- Variable values are correct and properly formatted
- No JavaScript errors appear in the console
- Data appears in your analytics platforms as expected
Regular validation catches issues before they corrupt your data. This connects to broader principles of conversion funnel analysis — you can’t analyze what you don’t accurately track.
Common Mistakes to Avoid
Even experienced implementers make these errors. Watch out for them in your own work.
Reinitializing the data layer: Never use dataLayer = [] after GTM loads. This destroys the existing data layer and breaks GTM. Always use dataLayer.push().
Pushing after GTM needs the data: If a tag fires on page load but you push data after load, the tag won’t have access to that data. Ensure push timing aligns with tag timing.
Inconsistent data types: If productPrice is sometimes a string (“29.99”) and sometimes a number (29.99), your analytics will have issues. Standardize data types.
Missing event key: If you want to trigger tags based on a data layer push, you must include the 'event' key. Without it, GTM receives the data but won’t fire event-based triggers.
Over-complicating the structure: Keep your data layer as flat as possible. Deep nesting makes variables harder to access and debug.
Getting Started: Your First Data Layer
Ready to implement? Here’s a simple starting point that works for most content sites.
Add this before your GTM container code:
<script>
  window.dataLayer = window.dataLayer || [];
  dataLayer.push({
    'pageType': 'article',      // or 'home', 'product', 'category', etc.
    'pageCategory': 'tracking', // your content category
    'author': 'Your Name'       // content author if applicable
  });
</script>
<!-- GTM container code -->
Then in GTM, create Data Layer Variables for pageType, pageCategory, and author. You can now use these in your GA4 configuration to send page metadata with every pageview.
From here, expand based on your needs. Add e-commerce events when users interact with products. Add form submission events when forms complete. Build incrementally, validating each addition before moving to the next.
The Bottom Line
The data layer is the foundation of professional-grade analytics implementation. It separates amateur tracking setups from robust, reliable measurement systems that survive redesigns, platform changes, and team turnover.
Yes, it requires developer involvement. Yes, it takes more initial effort than scraping values from the DOM. However, the investment pays off in data quality, debugging ease, and long-term maintainability. It also enables more accurate attribution modeling by ensuring all touchpoints are tracked consistently.
Start simple. Document everything. Validate constantly. Your future self — and your analytics data — will thank you.
For more on making sense of the data you collect, see our guide on what analytics in digital marketing actually means.